
Easy Lemon Bars with Buttery Shortbread Crust
Last Updated on July 31, 2026 by Barbara
By Barbara | Soul Food Cooking | SoulFoodCooking101.com
There is a certain kind of joy that only a bright, buttery dessert can bring, and these lemon bars are that joy on a plate. They glow on the cutting board, they fill the kitchen with the prettiest citrus smell, and they manage to be both fancy enough for company and easy enough for a regular Tuesday. If you’ve been looking for a treat that wakes up your whole afternoon, you found it.
I wanted to give you a real one this time. Not a fussy bakery imitation, not a shortcut version with bottled juice. A simple, honest little bar with a tender shortbread base and a tangy lemon top that catches the light. If you already love a chilled citrus dessert like my Lemon Icebox Recipe, you’re going to feel right at home here. Same kind of sunshine, brand new texture.

RECIPE OVERVIEW
- Prep: 15 min
- Cook: 40 min
- Total: 55 min (plus cooling)
- Servings: 12 to 16 bars
- Cuisine: Southern / American
- Course: Dessert
WHY YOU’LL LOVE THIS RECIPE
- The shortbread crust has lemon zest baked right into it, so the citrus flavor isn’t only sitting on top, it’s in the foundation of the bar.
- You don’t need a single fancy ingredient. Butter, sugar, flour, eggs, salt, and a couple of fresh lemons get the job done.
- The filling sets into a smooth, glossy lemon layer that slices clean once it has cooled, which makes plating these for company feel easy and a little impressive.
- If you love a bright citrus dessert, this one slides right alongside my Lemon Meringue Pie in the rotation. Same sunny flavor family, completely different feel on the plate.
- Active work clocks in at under an hour, with the bars cooling on the counter while you sip coffee and plan who gets the corner pieces.
INGREDIENTS
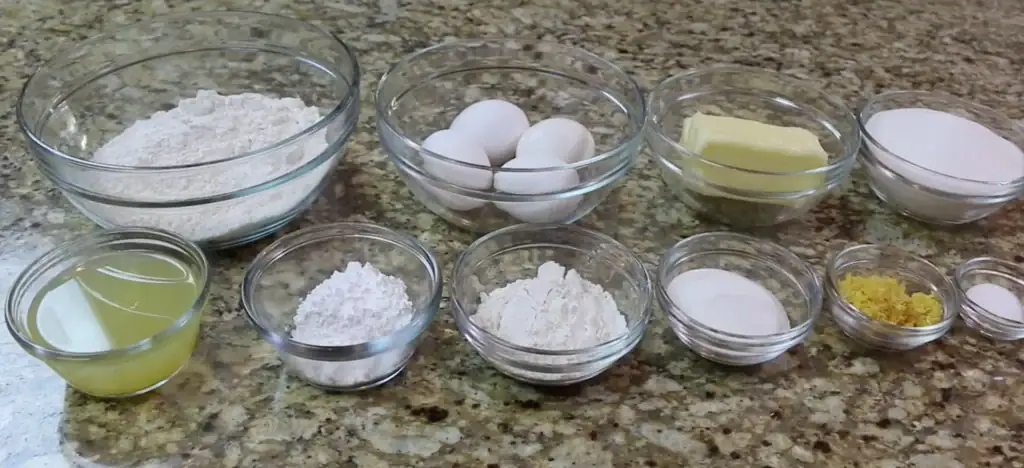
For the Crust:
- butter, softened
- sugar
- all-purpose flour
- salt
- lemon zest
For the Lemon Filling:
- eggs
- sugar
- all-purpose flour
- fresh lemon juice
For the Topping:
- confectioners sugar, for dusting
TOOLS YOU’LL NEED
- large mixing bowl
- electric mixer or stand mixer
- second bowl for the filling
- whisk
- 10 by 10 inch baking pan
- fine mesh sieve or small sifter for the powdered sugar
- sharp knife for slicing the bars
WATCH THE VIDEO
HOW TO MAKE THE BEST LEMON BARS
Step 1: Preheat Your Oven
Set the oven to 350 degrees and let it come up to temperature while you handle everything else. A hot oven from the jump is what gives you a crust with crisp edges and a tender middle.
Step 2: Cream the Butter and Sugar
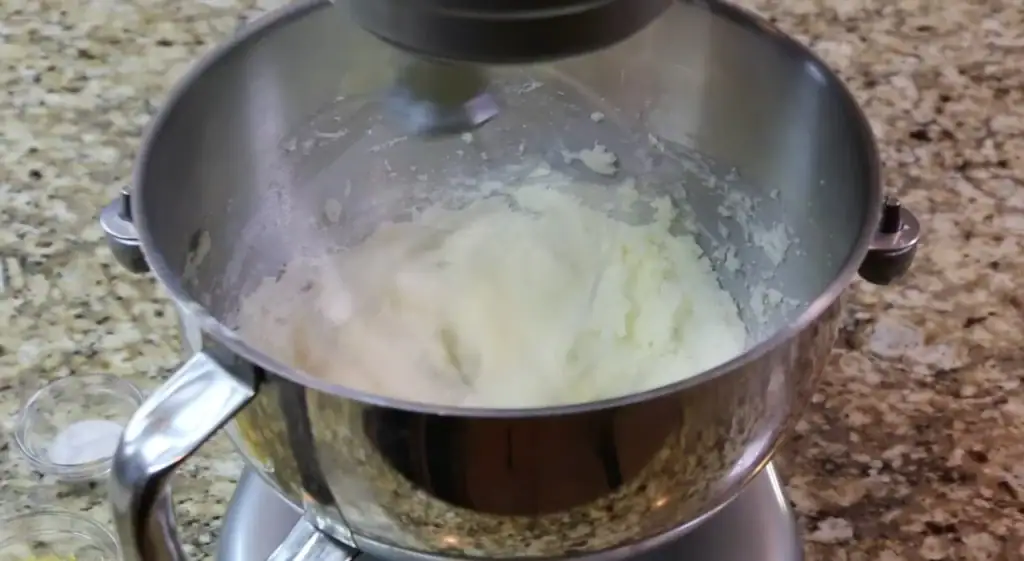
In your mixing bowl, cream the softened butter together with one cup of sugar. You’re looking for a pale, fluffy mixture, fam, not just blended. This is where the bar gets its melt-in-your-mouth texture, so give it a few good minutes on the mixer and watch it lighten up.
Step 3: Add the Lemon Zest and Salt
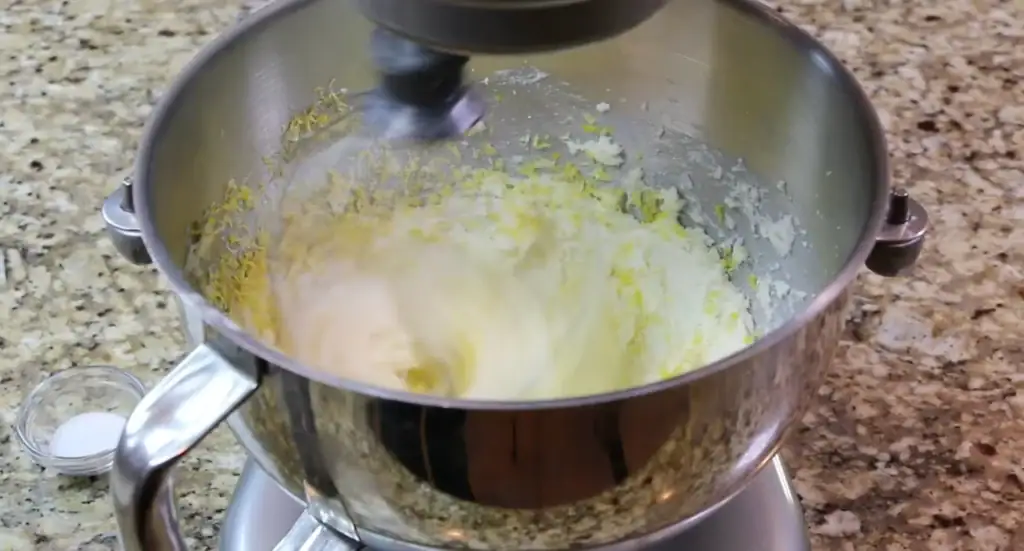
Drop in the lemon zest and salt and keep mixing until combined. Your kitchen is about to smell incredible. The zest wakes the whole shortbread up and gives it a citrus depth you can’t get any other way.
Step 4: Add the Flour to Form the Crust
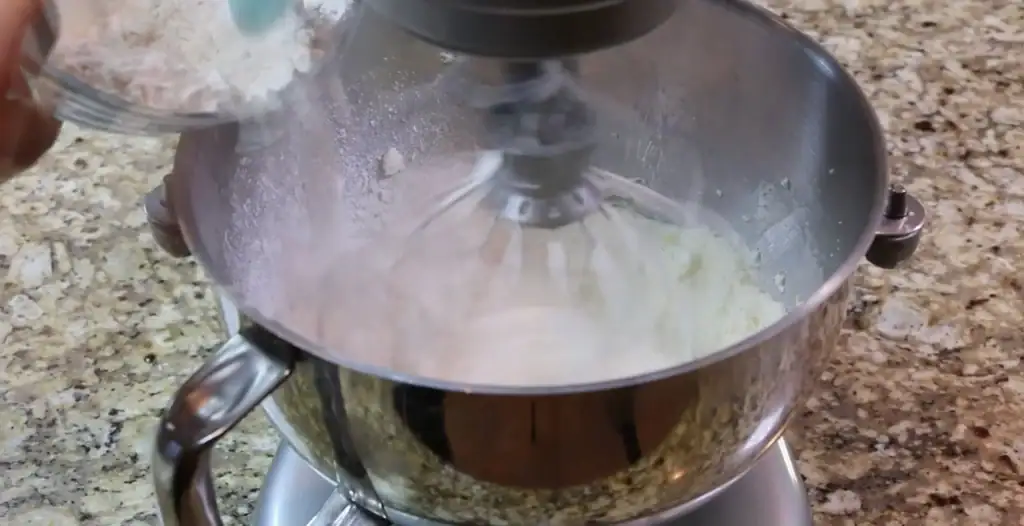
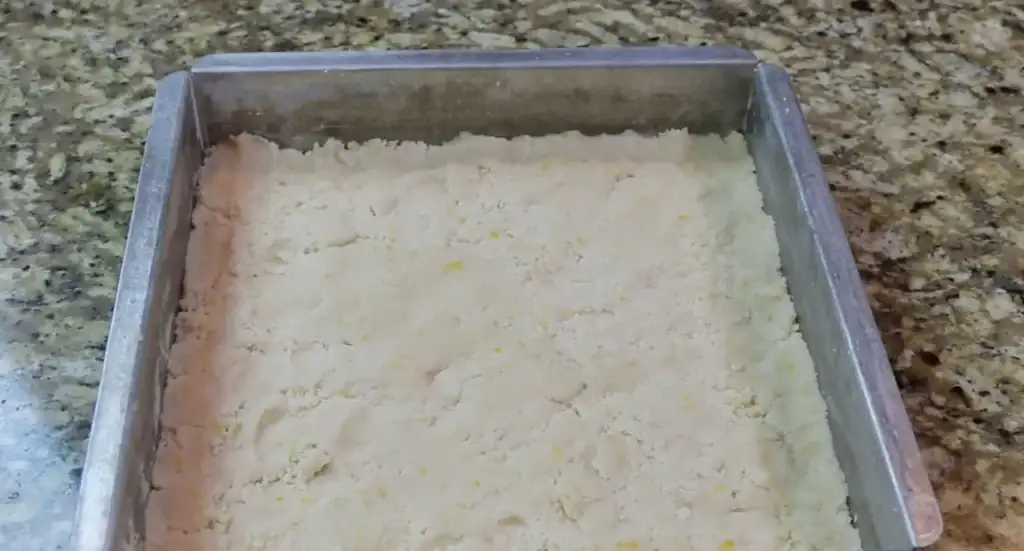
Slowly add the flour, mixing on low. You want a crumb-like texture that holds together when you pinch it, not a smooth dough. Adding the flour gradually gives it a chance to come together evenly. If it starts to clump, that’s perfect, you’re right where you need to be.
Step 5: Press the Crust into the Pan
Tip the crumbs into a 10 by 10 inch baking pan and press the crust into an even layer across the bottom. Use the flat bottom of a measuring cup if your hands aren’t getting it level. Press firmly, fam, because a loose crust will crumble when you cut the bars later. You want this base sturdy and compact.
Step 6: Bake the Crust
Slide the pan into the preheated oven and let the crust bake for 20 minutes. This pre-bake step keeps the bottom of your bars from going soggy once the wet filling hits. You’re looking for a soft golden color around the edges when it comes out, not a deep brown.
Step 7: Make the Lemon Filling
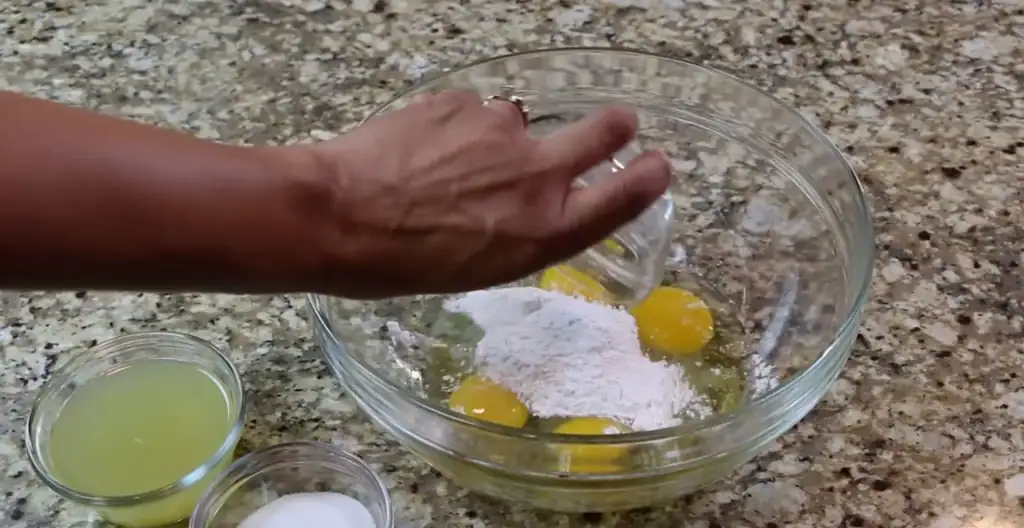
While the crust bakes, grab your second bowl and whisk the four eggs, three-quarter cup of sugar, five tablespoons of flour, and two-thirds cup of fresh lemon juice together until smooth. Take your time so the flour doesn’t lump. Fresh juice is what gives these bars their punch, and you’ll smell the difference the second you whisk it.
Step 8: Pour the Filling Over the Crust
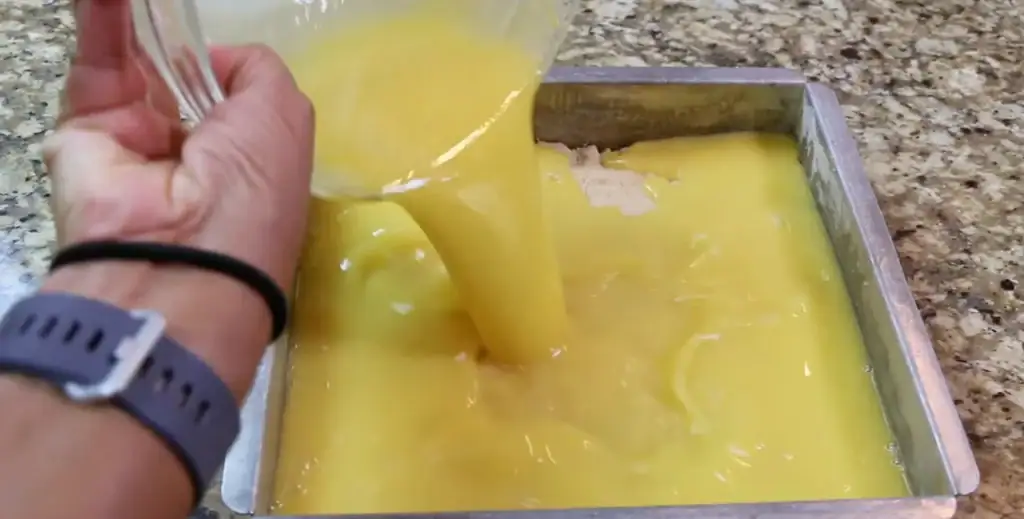
When the 20 minutes are up, pull the pan out and pour the lemon filling right over the hot crust. The heat from the crust helps the filling start setting from the bottom, which is exactly what you want. Tilt the pan a little so the filling settles into the corners.
Step 9: Bake the Lemon Bars
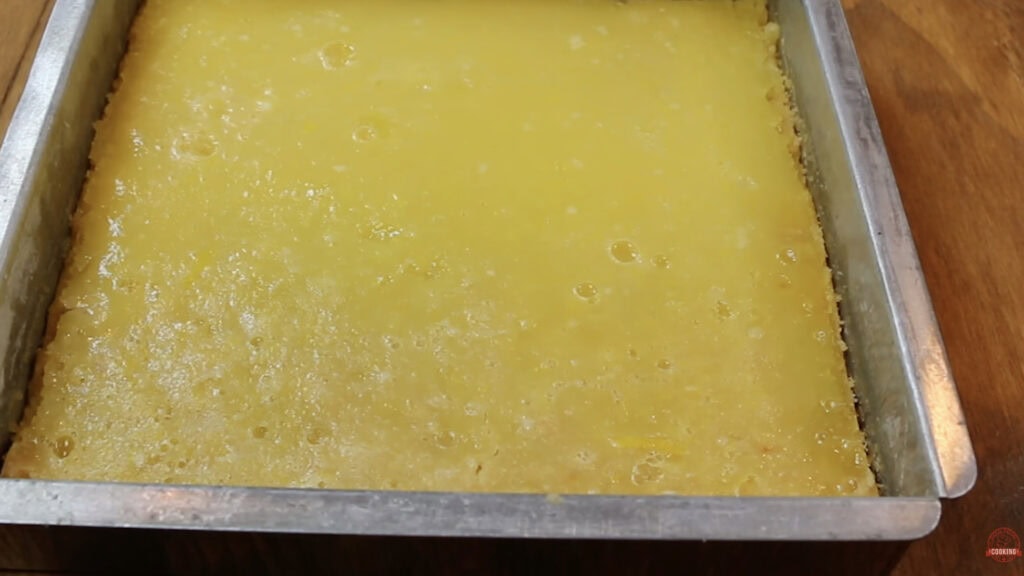
Return the pan to the oven and bake for another 20 minutes. You’re done when the top has a smooth, slightly glossy look and the center barely jiggles when you nudge the pan. The filling firms up more as it cools, so resist the urge to give it extra time.
Step 10: Cool the Bars
Set the pan on a wire rack or a folded towel and let the bars cool for at least 10 minutes before you touch them. Honestly, longer is better. The lemon layer needs the cool-down to set properly, and cutting too early gives you a runny middle. If you can stretch it to 30 minutes, even better.
Step 11: Dust and Cut
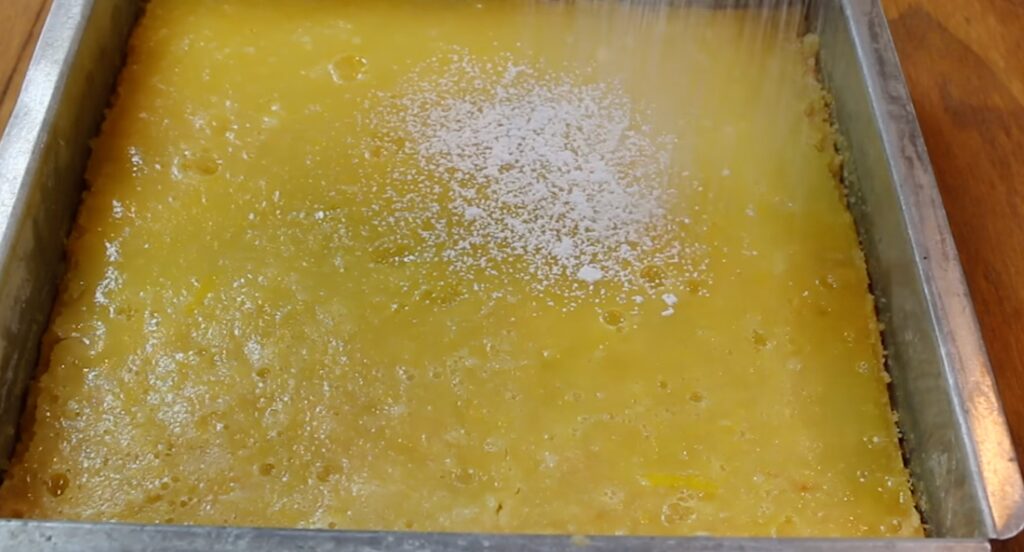
Once the bars are cool, sift confectioners sugar generously over the top. Cut into squares with a sharp knife, wiping the blade between cuts so each slice comes up clean. That powdered sugar top is what makes these bars look like something out of a bakery window. Plate them up, fam, they’re ready.
WHAT TO SERVE WITH LEMON BARS
Lemon bars stand on their own beautifully, but they also love good company. A glass of sweet tea is the obvious Southern partner, and a scoop of vanilla ice cream on the side turns them into a real dessert plate. Fresh berries are a natural fit too, especially summer strawberries and blueberries.
If you’re putting together a dessert spread for a potluck or a holiday, give these bars some company on the table. A slice of Key Lime Pie With Biscoff Cookie Crust keeps the citrus theme going, while a wedge of Strawberry Pie Recipe brings a soft sweetness that plays off the tart bars. If the gathering calls for warm and cozy, set a pan of Homemade Peach Cobbler next to the lemon bars and watch the table light up. And for a tray of handheld treats, a stack of Chocolate Chip Cookies is the easy partner that lets people grab one of each.
HOW TO STORE
Store the lemon bars in an airtight container in the refrigerator and they’ll keep beautifully for up to five days. Layer parchment paper between the rows so the powdered sugar tops don’t smudge against each other. If you’ve cut them ahead, give the bars a fresh dusting of confectioners sugar right before serving so they look bakery-pretty when they hit the table.
PRO TIPS
- Always use fresh lemons. Bottled juice will work in a pinch, but the brightness and aroma you get from real lemons is the whole reason this recipe sings. Zest them before you juice them, it’s way easier.
- Let your butter come to true room temperature before you start. Cold butter won’t cream into the sugar properly and you’ll end up with a crust that’s dense instead of tender. The same butter-handling trick shows up in my Classic Butter Pound Cake With Butter Drizzle, so once you nail the technique here, you’ll have it for life.
- Press the crust down hard. I mean really pack it in there. A loose crust is the number one reason lemon bars fall apart when you cut them, so don’t be gentle with this step.
- Don’t skip the pre-bake on the crust. Twenty minutes of baking on its own is what keeps the bottom crisp once the wet filling goes on. It’s the difference between a clean-slicing bar and a soggy disappointment.
- Cool completely before you cut, fam. I know it’s hard, the kitchen smells amazing, but a warm pan gives you raggedy edges. A fully cooled pan gives you clean, picture-worthy squares.
FAQS
You can, but the flavor takes a real hit. Fresh lemon juice brings a brightness and a perfume that bottled simply doesn’t have. If fresh lemons are anywhere within reach, use them. Your lemon bars will taste like a different dessert.
Two main culprits. Either the bars needed a few more minutes in the oven, or the filling was short on flour. The full five tablespoons of flour is what helps the lemon layer set properly, so measure carefully. The center should be set with the slightest jiggle when you pull the pan out, and it’ll firm up the rest of the way as it cools.
Absolutely. Lemon bars are one of the rare desserts that taste even better on day two, once the flavors have had a chance to settle in the fridge. Hold off on the confectioners sugar dusting until right before serving so the top stays clean and pretty.
The recipe is built for a 10 by 10 inch pan, which gives you a bar with a nice balance of crust to filling. A larger pan will give you thinner bars and a shorter bake time. A smaller pan will give you thicker bars and might need a few extra minutes in the oven. Keep an eye on the filling and pull the pan when the center has that slight jiggle.
The edges of the filling will look set, the top will have a smooth, slightly glossy finish, and the middle will have a soft jiggle when you nudge the pan. The bars finish setting as they cool, so trust the visual cues and don’t overbake or you’ll lose that tender lemon texture.
If you love the bar-style format, a slice of Coffee Crumb Cake hits that same handheld, crumb-topped sweet spot. And if you’re craving a buttery dessert with a totally different flavor, Brown Butter Sweet Potato Pie brings the cozy energy when lemon isn’t the mood.
JOIN THE #SFCFAMILY!
I want the full play-by-play, fam. When you make these lemon bars, come back and walk me through how the kitchen took to them. Did the powdered sugar make it to the table, or did the taste-testers in your house wipe out the corner pieces first? Did you serve them at a cookout, a Sunday dinner, or a quiet afternoon coffee break? Every message from the #SFCFamily lands with me, and reading how you put your own spin on a recipe is one of the best parts of my day. After the bars come out of the pan, snap a picture of your plate and share it on the Soul Food Cooking app so the rest of the family can see what your kitchen is putting out. If you haven’t downloaded the app yet, pick it up free at https://soulfoodcooking101.com/soul-food-cooking-app/ and keep every recipe in your pocket. While you’re poking around the catalog, save a classic like my Best Southern Banana Pudding Recipe so the lemon bars have good company on your next dessert spread.
Lemon Bars
Ingredients
- For the Crust:
- 1 cup butter softened
- 1 cup sugar
- 2 cups all-purpose flour
- 1 teaspoon salt
- 2 tablespoons lemon zest
- For the Filling:
- 4 eggs
- 3/4 cup sugar
- 5 tablespoons all-purpose flour
- 2/3 cup fresh lemon juice
- For the Topping:
- Confectioners sugar for dusting
Method
- Preheat oven to 350 degrees.
- Cream together butter and 1 cup sugar until light and fluffy.
- Add lemon zest and salt, mix until well combined.
- Slowly add 2 cups flour and mix until the mixture has a crumb-like consistency.
- Press the crust firmly into the bottom of a 10 by 10 inch baking pan.
- Bake the crust for 20 minutes.
- While the crust bakes, whisk together eggs, 3/4 cup sugar, 5 tablespoons flour, and 2/3 cup fresh lemon juice.
- Pour the filling over the baked crust.
- Bake for an additional 20 minutes.
- Remove from oven and cool for at least 10 minutes.
- Dust with confectioners sugar, cut into squares, and serve.
