
The Best Homemade Chocolate Ice Cream (No Machine Needed!)
By Barbara | Soul Food Cooking | SoulFoodCooking101.com
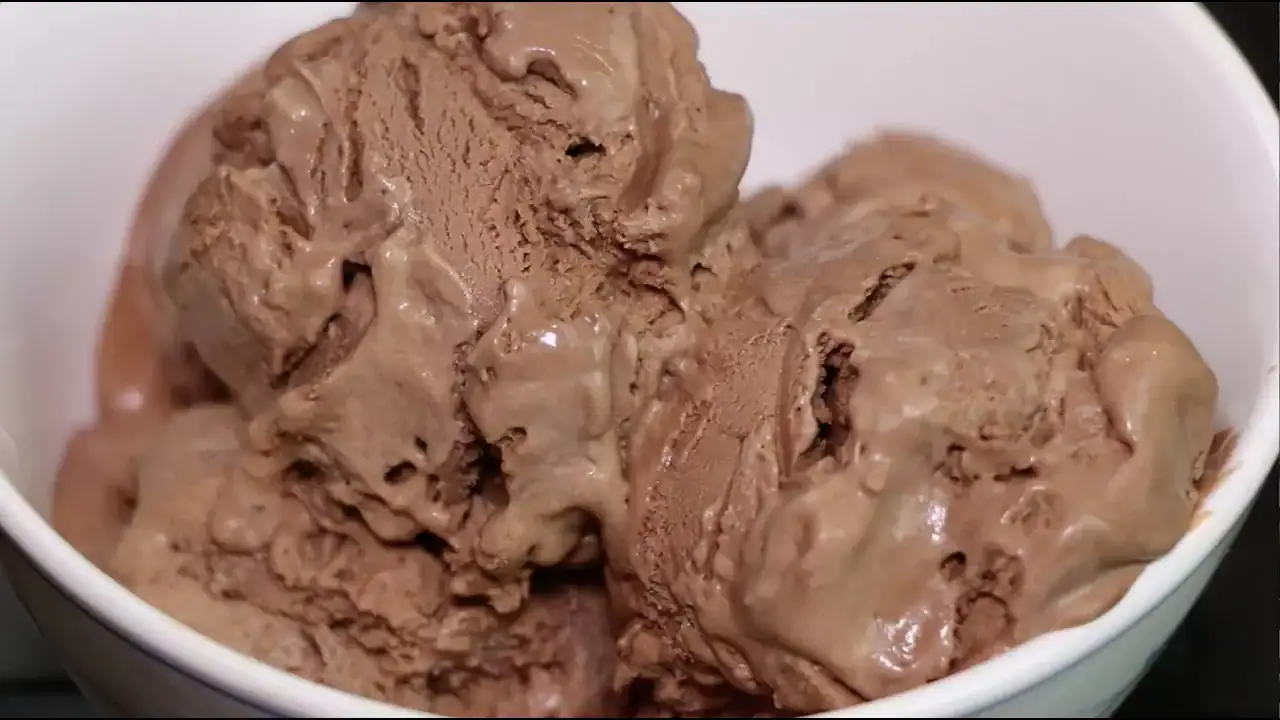
If you’ve ever wanted homemade ice cream but figured you needed a special machine to pull it off, this one is for you. This chocolate ice cream comes together with four simple ingredients and no ice cream maker anywhere in sight. It’s deep, rich chocolate that scoops up soft and creamy straight from the freezer.
The secret is sweetened condensed milk. It keeps the ice cream smooth and scoopable instead of icy, so you get a soft, creamy texture with no churning and no ice crystals. What you end up with is a chocolate ice cream that tastes like a scoop from an old fashioned parlor, made right in your own freezer. If you love a cold treat that comes together without any fuss, you’ll feel the same way about my Lemon Icebox Recipe.
Recipe Overview
- Prep: 15 min
- Freeze: 5 hours
- Total: 5 hours 15 min
- Servings: about 8
- Cuisine: American
- Course: Dessert
Why You’ll Love This Recipe
You don’t need an ice cream maker, an ice bath, or any fancy equipment. All it takes is a bowl, a mixer, and a loaf pan. The sweetened condensed milk does the work a machine would normally do, so the ice cream freezes up soft and creamy instead of hard and icy. With only four ingredients, there’s nothing complicated to shop for, and the chocolate flavor is deep and rich because you’re using real cocoa powder, the same cocoa that carries my The Best Chocolate Cake Recipe. Once you see how easy it is to make ice cream at home, you’ll want to keep a pan of it in the freezer all summer long, right alongside a bowl of my Best Southern Banana Pudding Recipe.
Ingredients
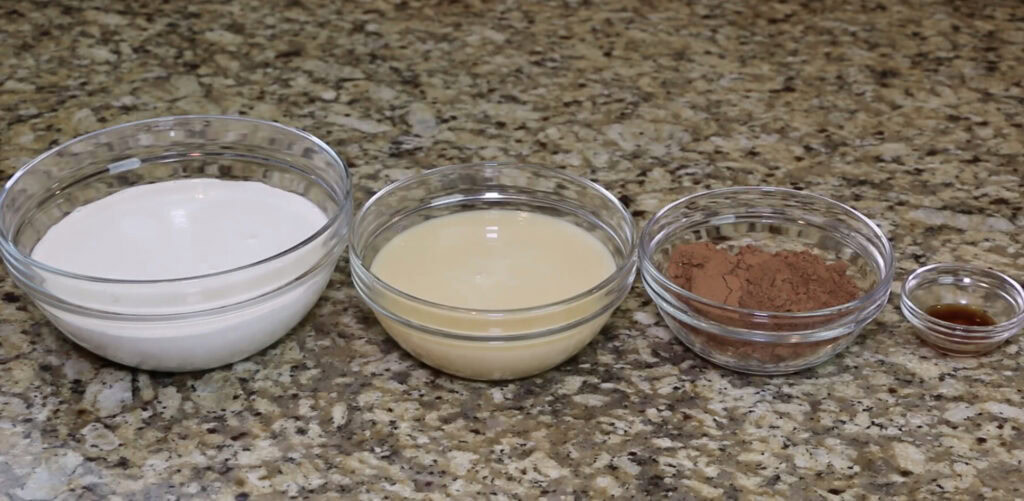
Four ingredients, and each one earns its place. Here’s what to reach for.
- Unsweetened cocoa powder. This is where all the chocolate flavor comes from, so use a cocoa you like the taste of. Natural cocoa gives you a bright, classic chocolate flavor, while Dutch-process cocoa runs darker and smoother. Either one works beautifully here.
- Sweetened condensed milk. Don’t swap this for evaporated milk, they are not the same thing. The condensed milk is thick and sweet, and it’s what keeps the ice cream soft and scoopable without an ice cream maker.
- Heavy whipping cream. You want cream with a high fat content, cold from the refrigerator. That fat is what whips up into the light, airy body that makes this taste like real ice cream.
- Vanilla extract. A little vanilla rounds out the chocolate and adds that parlor flavor. Pure vanilla extract is worth it here.
Tools You’ll Need
- A large mixing bowl
- A whisk
- An electric mixer, either a hand mixer or a stand mixer
- A rubber spatula for folding
- A metal loaf pan
- Plastic wrap, foil, or a lid to cover the pan
Watch The Video
How to Make Homemade Chocolate Ice Cream
Step 1: Whisk the Chocolate Base
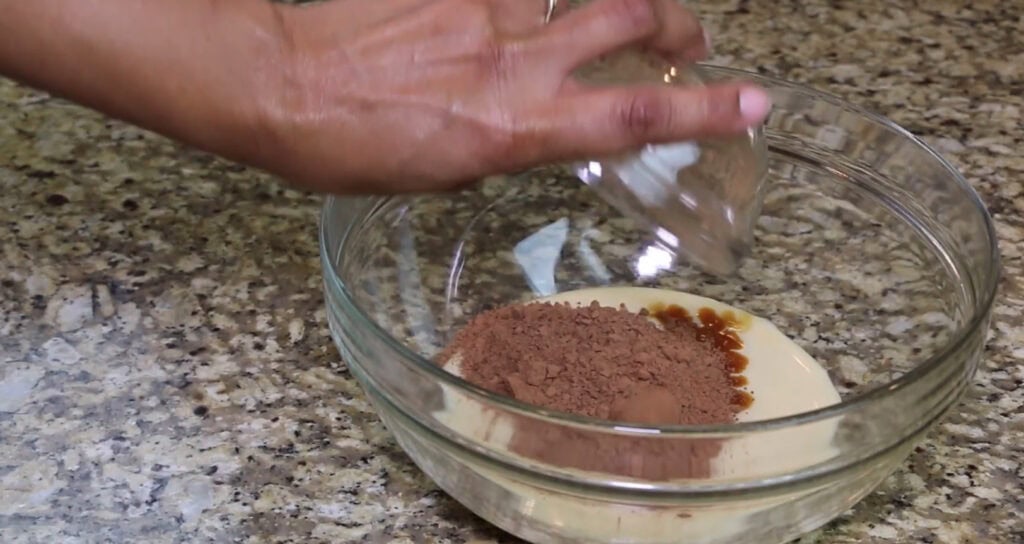
In a large bowl, whisk together the sweetened condensed milk, the vanilla, and the cocoa powder until it’s smooth. It will be thick and fudgy, almost like a chocolate frosting, and that’s exactly what you want. Take your time here and whisk out any lumps of cocoa so your ice cream comes out smooth from top to bottom.
Step 2: Whip the Cream
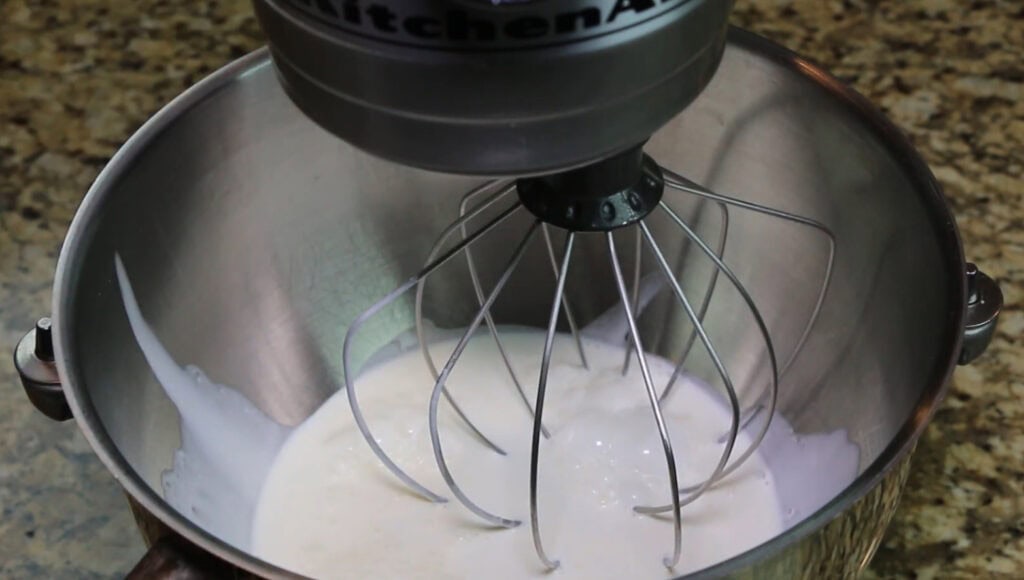
In a separate bowl, use your mixer to whip the heavy cream on medium speed until it’s firm. You’re looking for the cream to hold its shape when you lift the beaters, but you don’t want to go so far that it turns grainy. Whipping the cream is what gives this ice cream its light, airy body, so this step really matters.
Step 3: Fold It All Together
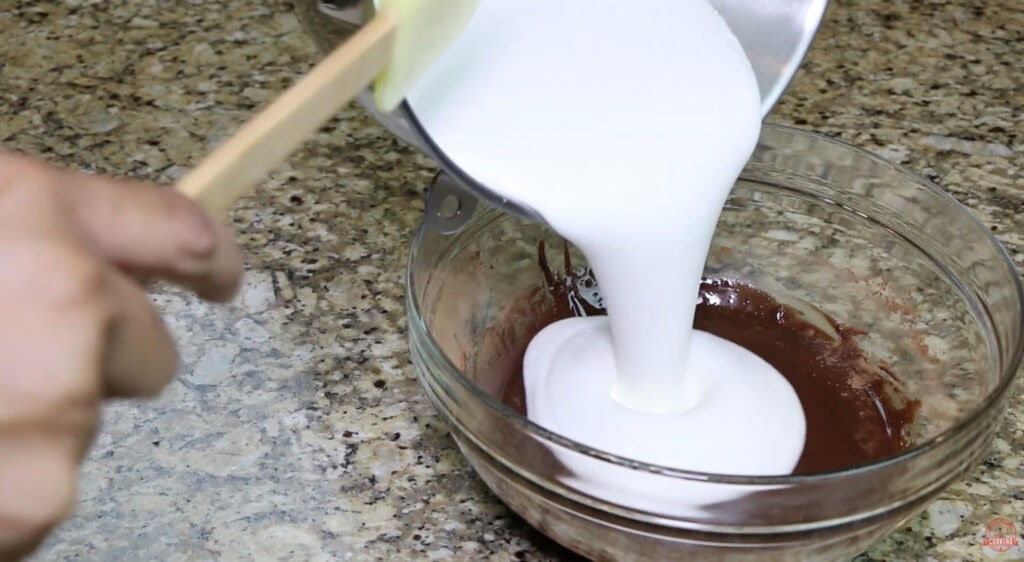
Now gently fold the whipped cream into your chocolate mixture until it’s well combined. Use a rubber spatula and a light hand, folding from the bottom up instead of stirring hard. Stirring too roughly knocks the air out of the cream, and that air is what keeps the ice cream soft and scoopable. Keep folding until you don’t see any streaks of white left.
Step 4: Freeze Until Firm
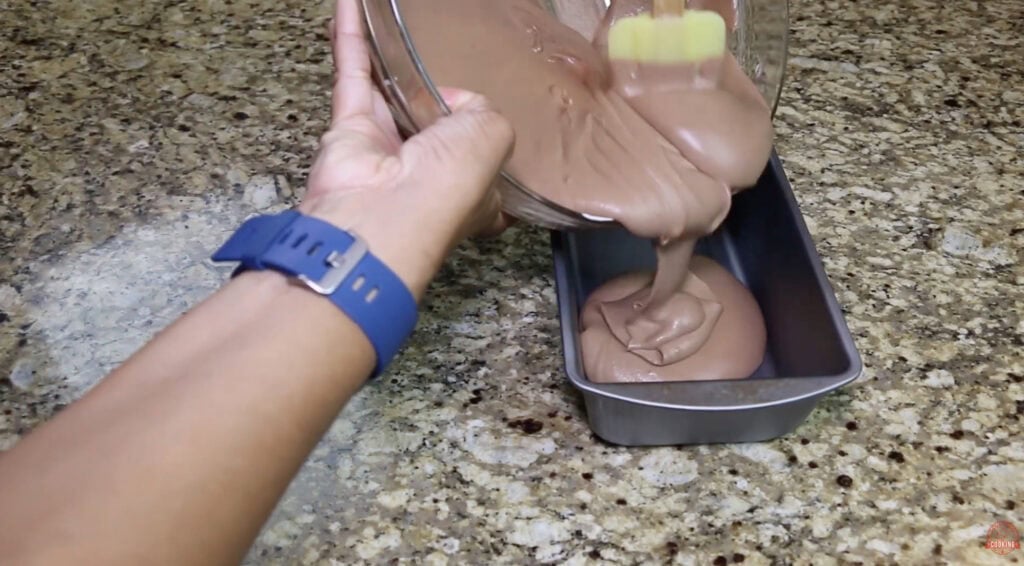
Transfer the mixture to a metal loaf pan and smooth out the top. Cover it well, then freeze for at least 5 hours or until it’s firm all the way through. A metal pan helps the ice cream freeze faster and more evenly than a glass or plastic dish. If you can wait overnight, even better, because it gives the ice cream time to set up nice and firm.
Flavor Variations to Try
The chocolate base is a blank canvas, so once you’ve made it a time or two, have fun with it.
- Mocha. Whisk a spoonful of instant espresso powder into the base. Coffee deepens chocolate and makes the flavor taste richer.
- Mexican hot chocolate. Add a little cinnamon and a tiny pinch of cayenne for a warm, spiced finish, the same cozy flavor as my Homemade Hot Chocolate, only frozen.
- Cookies and cream. Fold in a handful of crushed chocolate sandwich cookies right before you pour the mixture into the pan.
- Rocky road. Fold in mini marshmallows and chopped toasted nuts for that classic chunky texture.
- Peanut butter swirl. Drop spoonfuls of softened peanut butter over the top and swirl it through with a knife before freezing.
What to Serve With Chocolate Ice Cream
This chocolate ice cream is wonderful all on its own, but it’s also the perfect partner for so many desserts. Scoop it next to a warm slice of my Peach Cobbler Recipe or a piece of my Perfect Cream Cheese Pound Cake Recipe and watch it start to melt. It’s the classic partner for anything served à la mode, so a scoop over my warm The Best Chocolate Lava Cake or a slice of my Sweet Potato Pie is pure heaven.
It’s also beautiful in a bowl with a drizzle of caramel, a handful of chopped nuts, or a swirl of whipped cream on top. You can sandwich a scoop between two of my Chocolate Chip Cookies for an easy ice cream sandwich, or float a scoop in a tall glass of root beer for an old fashioned float.
How to Store
Keep your ice cream in the loaf pan with a tight cover, or move it to an airtight container. Press a piece of plastic wrap right down onto the surface before you put the lid on, because that keeps ice crystals from forming on top. Stored this way in the freezer, it’ll stay creamy and good for up to two weeks.
How to Serve
HOW TO SERVE AFTER FREEZING
Homemade ice cream freezes a little harder than the store bought kind because it doesn’t have all those extra additives. If it’s too firm to scoop straight from the freezer, let the pan sit out on the counter for about 5 to 10 minutes to soften. A scoop dipped in warm water also glides through much easier and gives you those pretty round scoops.
Pro Tips
- Start with cold heavy cream straight from the refrigerator, because cold cream whips up faster and holds more air. Chilling your bowl and beaters in the freezer for a few minutes first helps even more.
- Whisk the cocoa powder into the base really well so there are no dry lumps hiding in your ice cream.
- When you fold, be gentle and stop as soon as the color is even, since overmixing deflates the cream.
- Don’t skip the metal loaf pan if you have one, because it freezes the ice cream faster and gives you a better texture than glass.
FAQS
That’s right, you don’t. The whipped cream adds the air that a machine would normally churn in, and the sweetened condensed milk keeps everything soft and smooth. All you do is whisk, whip, fold, and freeze.
Yes. Any freezer safe container will work. A metal loaf pan freezes the ice cream fastest, but a glass dish or a plastic container with a lid will do the job too. Just know it may take a little longer to freeze firm.
Usually it comes down to the cream not being whipped enough, or the mixture being overmixed when you folded it together. Whip the cream until it holds its shape, and fold gently so you keep all that air in. Covering the surface tightly before freezing also helps keep ice crystals away.
Absolutely. Fold in chocolate chips, chopped nuts, crushed cookies, or a swirl of peanut butter right before you transfer everything to the pan. Add them at the very end so they stay evenly spread through the ice cream.
Give it at least 5 hours so it firms up all the way through. If you have the time, freezing it overnight gives you the best texture and the cleanest scoops.
JOIN THE #SFCFAMILY!
If you made this Homemade Chocolate Ice Cream, I want to hear from you! Drop a comment below and let me know how it turned out. Did you add your own twist? Did your family go crazy for it? I read every single comment and I love hearing from my #SFCFamily.
Don’t forget to LIKE this video, SUBSCRIBE to the Soul Food Cooking channel, and hit that notification bell so you never miss a new recipe. Share this recipe with someone you love because good food is always better when it’s shared!
Find more delicious Southern recipes at SoulFoodCooking101.com and follow me on social media for daily cooking inspiration. Until next time, remember to cook with love, eat with joy, and always season your food!
Barbara
More Tasty Desserts
Homemade Chocolate Ice Cream
Ingredients
- 1 and 1/2 cups unsweetened cocoa powder
- 1 can 14 ounces sweetened condensed milk
- 2 cups heavy whipping cream
- 1 teaspoon vanilla extract
Method
- In a large bowl, whisk together the sweetened condensed milk, vanilla, and cocoa powder until smooth.
- In a separate bowl, whip the heavy cream on medium speed until it is just firm.
- Gently fold the whipped cream into the chocolate mixture until well combined.
- Transfer to a metal loaf pan, cover, and freeze for at least 5 hours.
